How to lock your iPad into a single App
Learn how to turn your iPad or iPhone into a single-use tool, whether temporarily or permanently. Lock your device to use a specific App. Prevent others from accessing other iPad Apps or changing its settings.
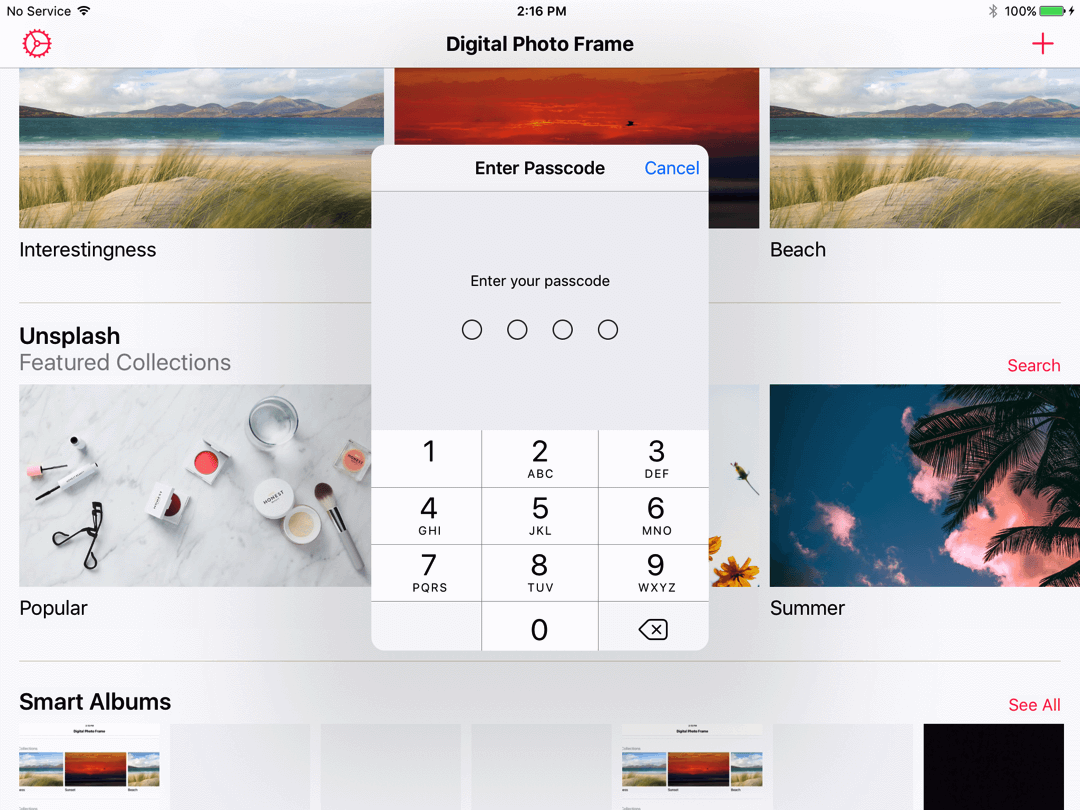
Either if you want to prevent your children to close an App or because you're using your iPad in your business sometimes you may want your iPad to be open lock into a single App.
How Do I Prevent others from Switching Apps On The iPad?
Luckily iPads and iPhones give you control over this and you can prevent others from accessing other Apps or changing the device settings. You can quickly lock your device to a certain app before handing it over or lockdown an entire device with comprehensive parental controls.
There is a built-in iOS feature named Guided Access that will do most of the heavy lifting here. Guided Access is ideal for locking your device into a single App use.
Steps to lock your iPad or iPhone into a single App
1. Activate Guided Access in Settings
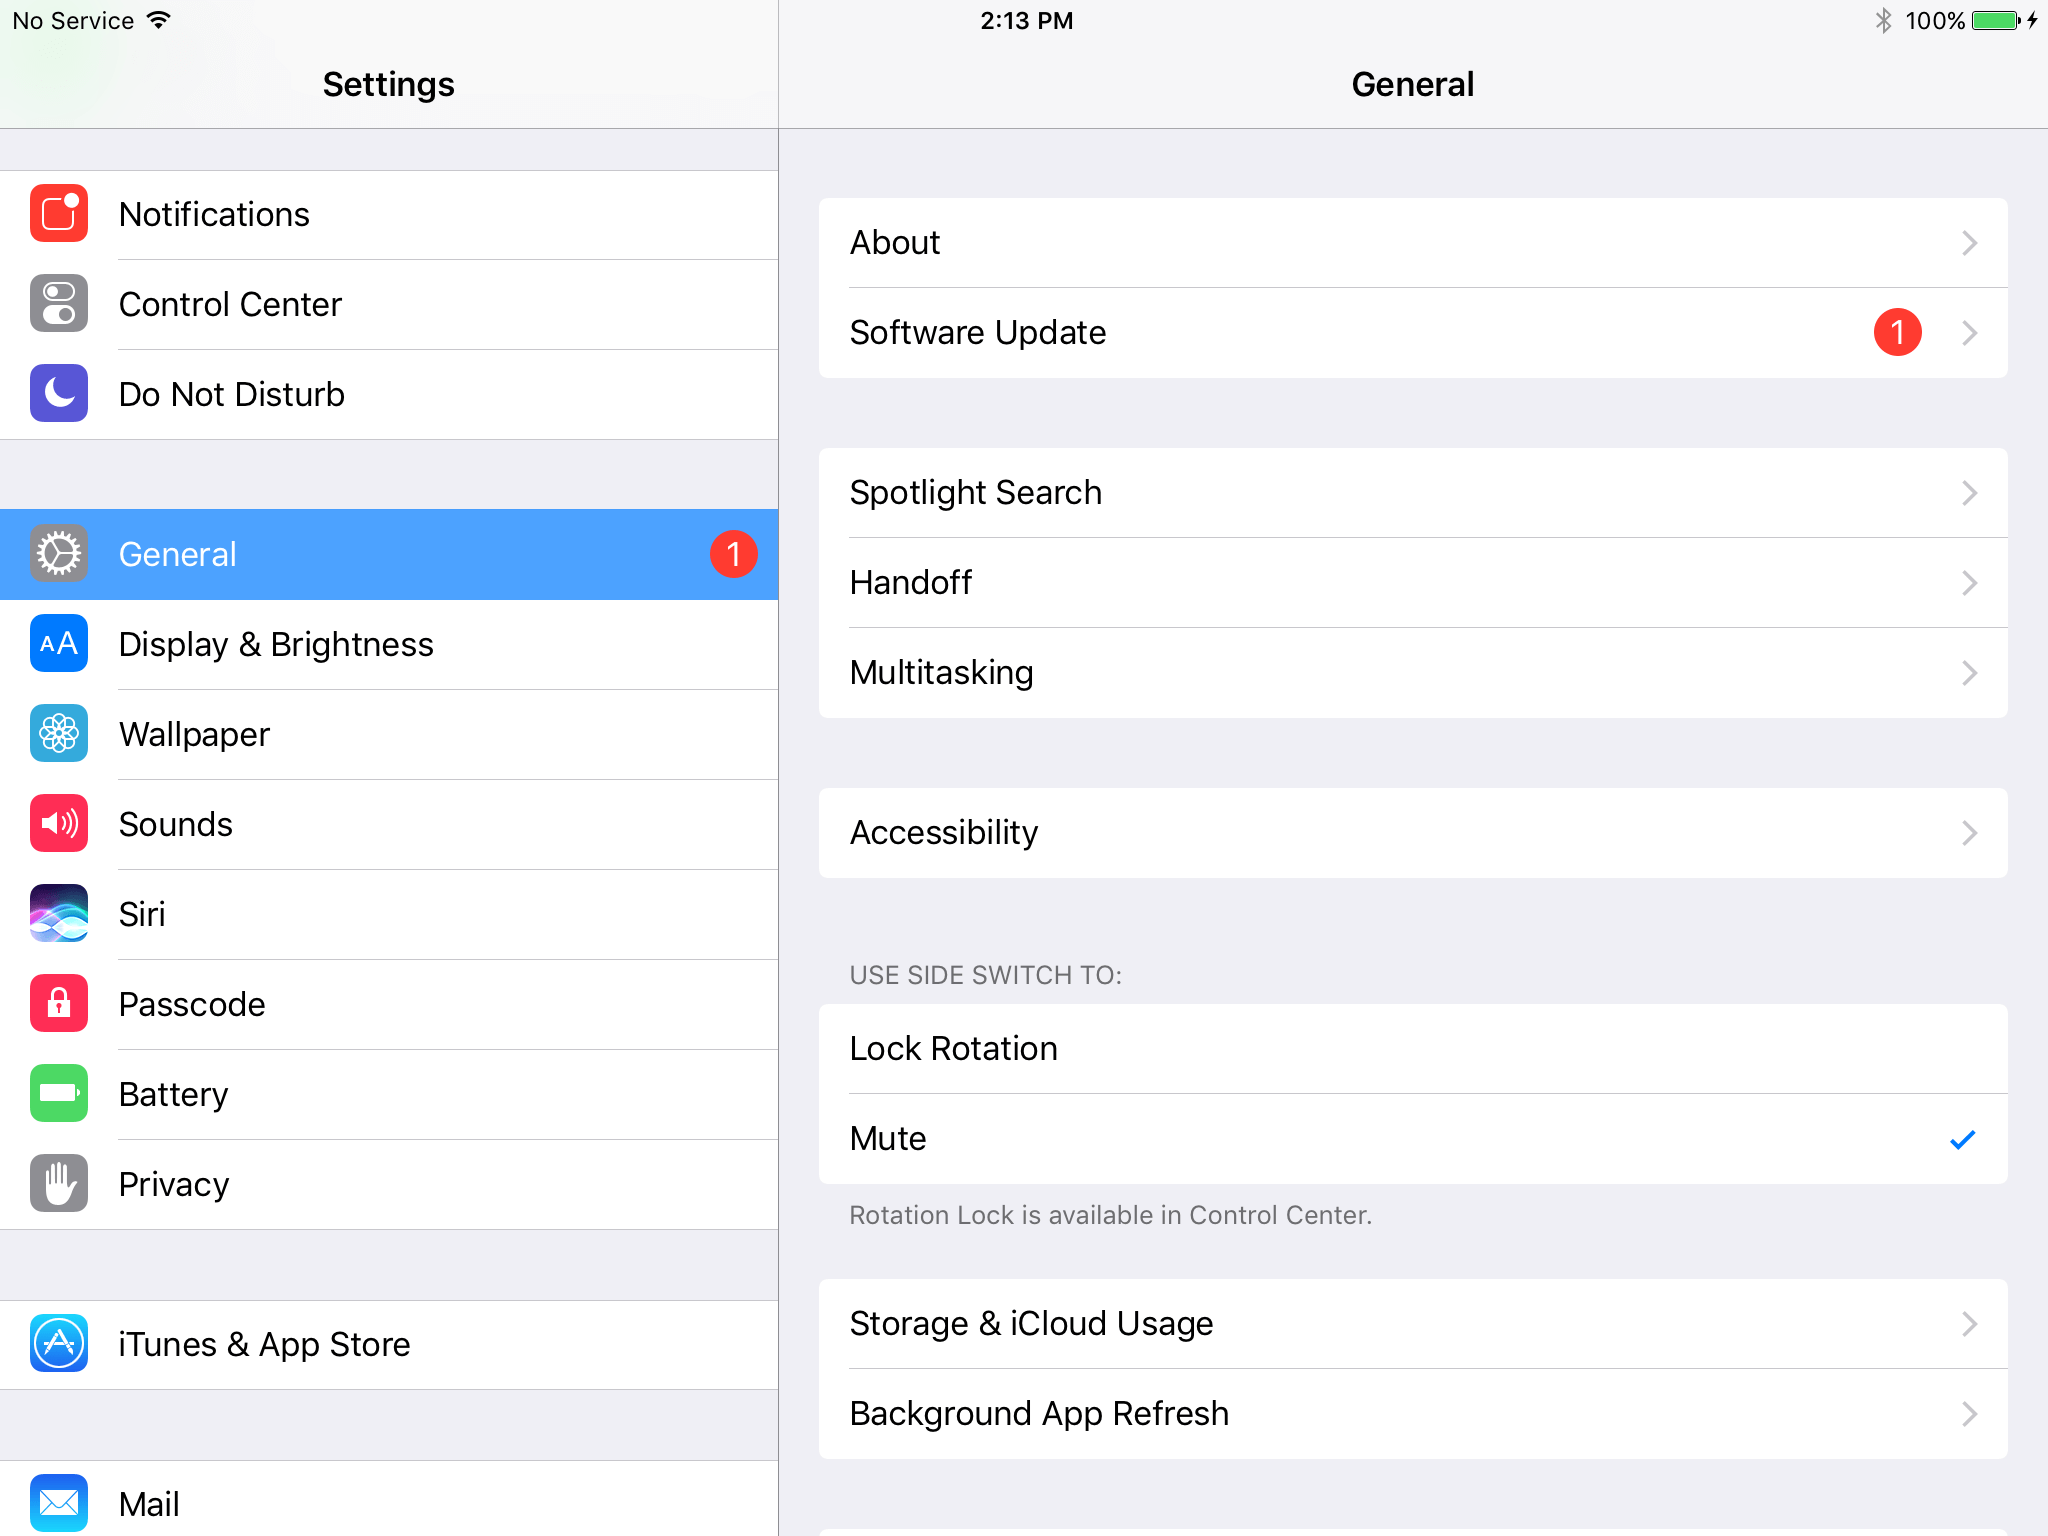
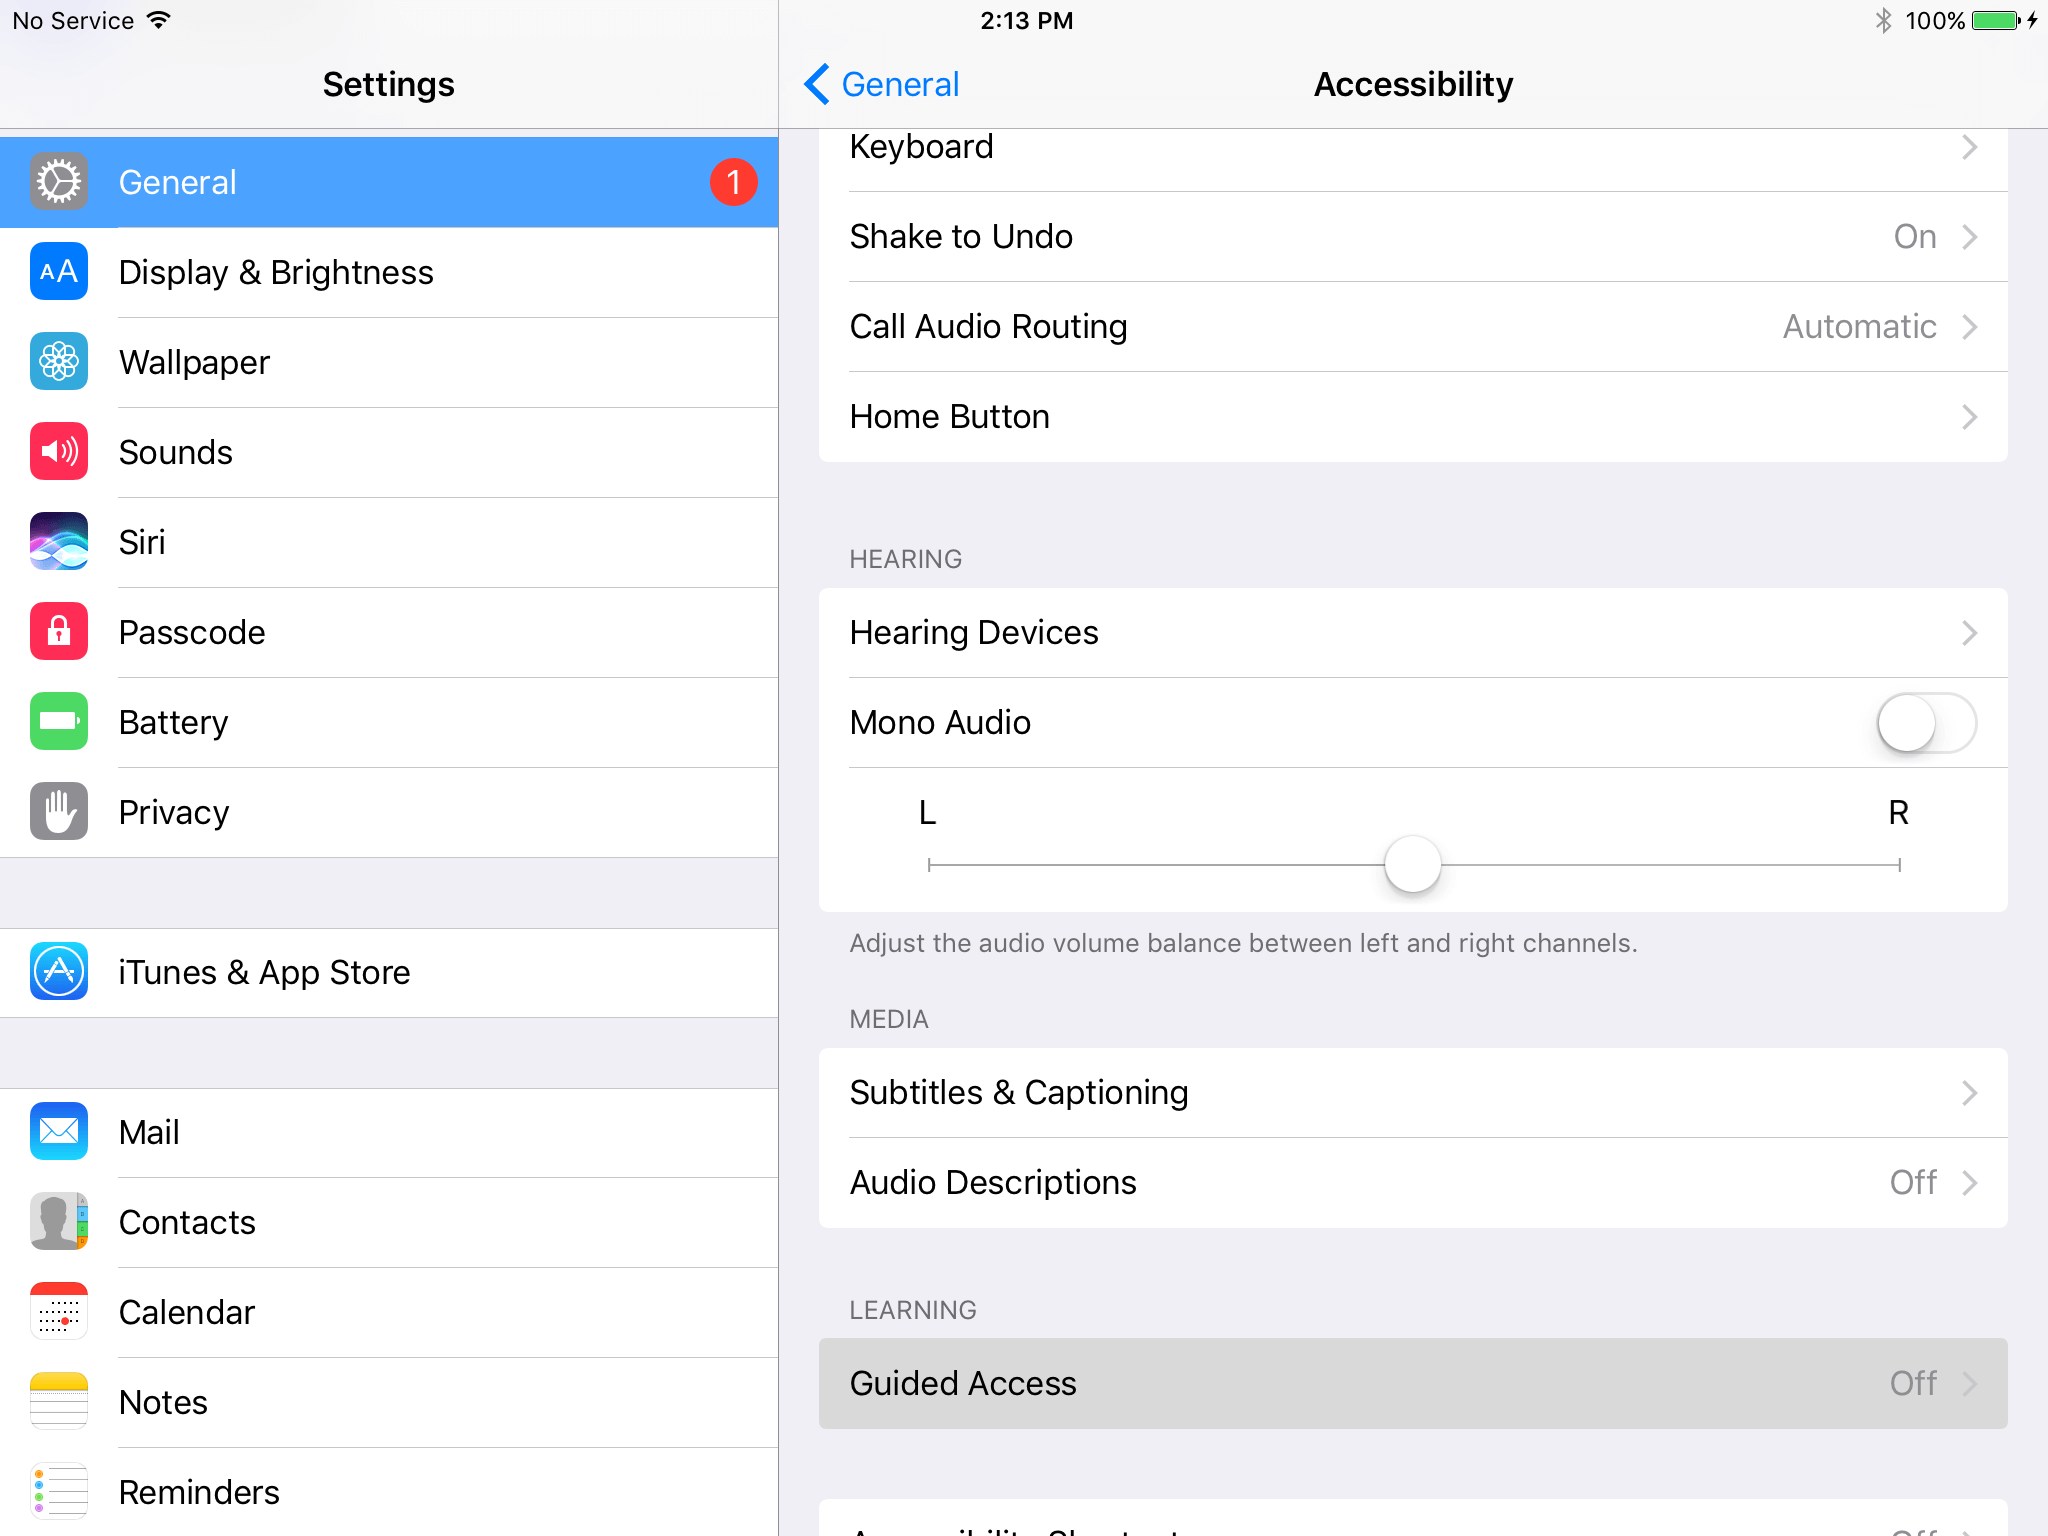
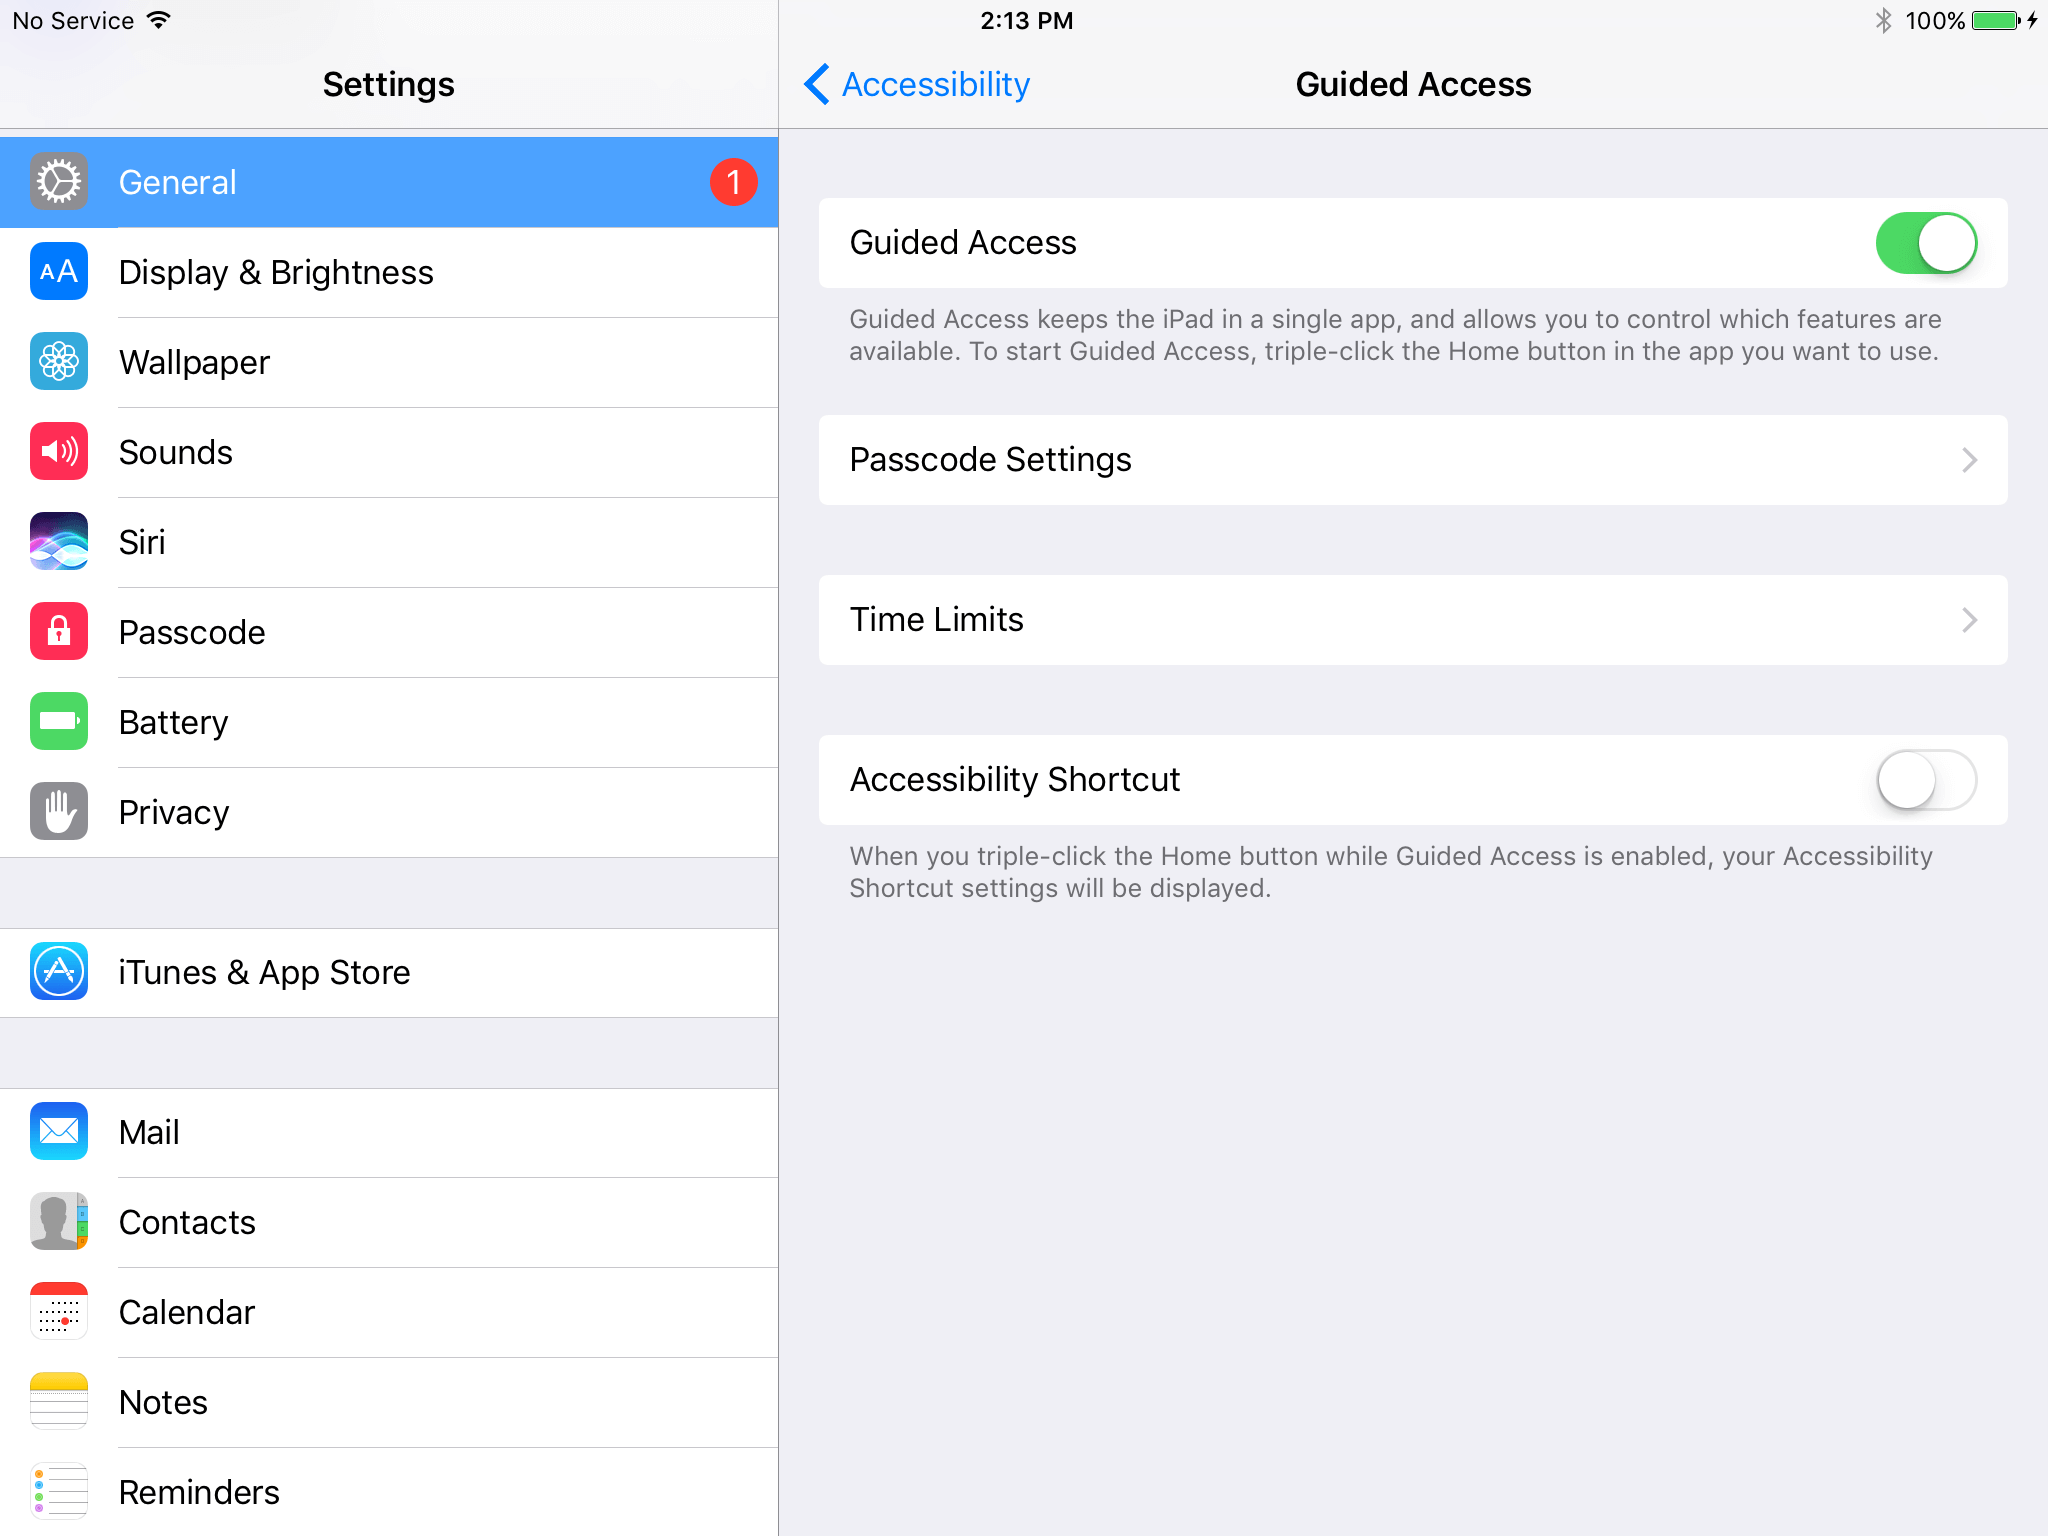
Navigate to Settings > General > Accessibility, scroll down to Learning, and then switch the Guided Access toggle to the on position.
2. Start a Guided Access Session with the App you want to lock
To turn Guided Access on, head into the app you wish to lock in place. Now triple-press the Home button if your device has one, or the side button on an iPhone X-class device.
Tap Start in the top right corner, then input a passcode to lock the app in place as the only usable function.
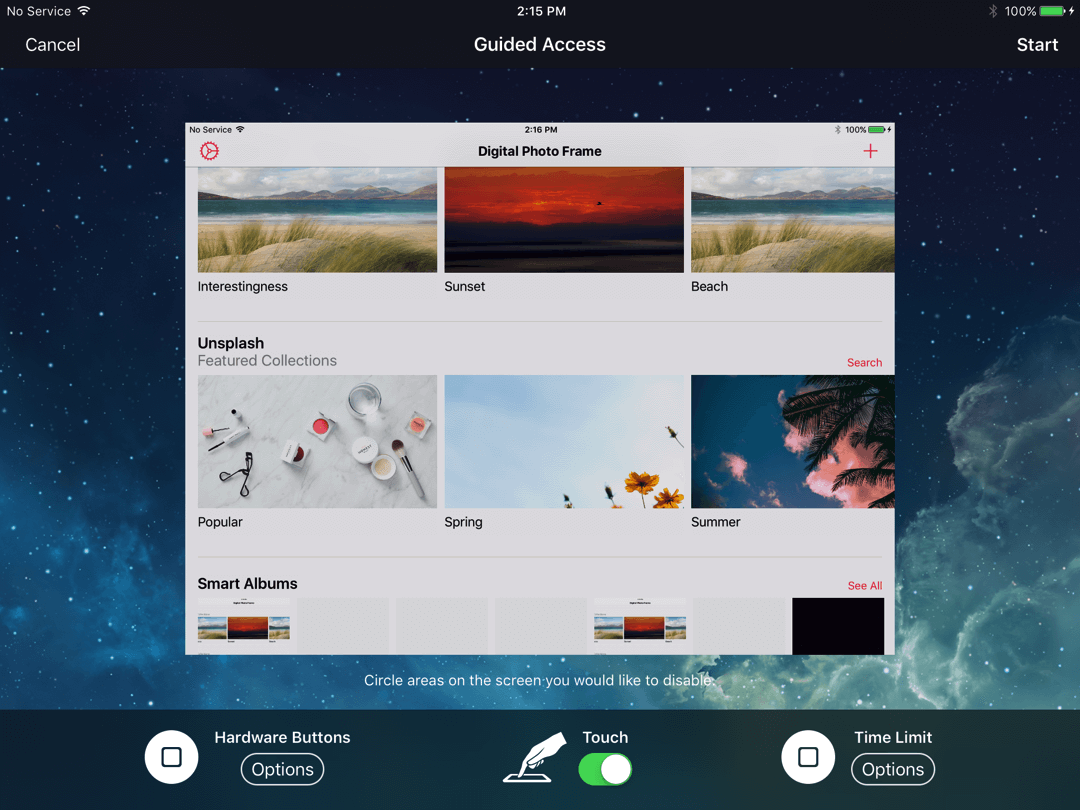
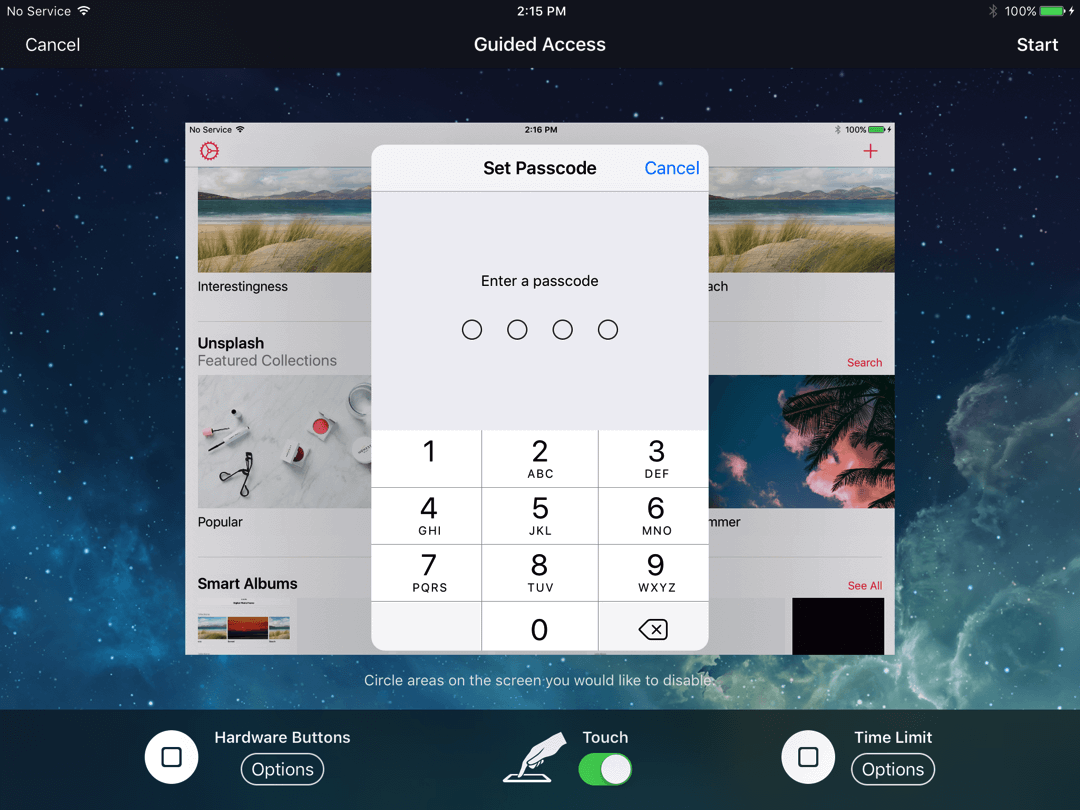
3. Stop a Guided Access Session
Triple-click the Home or Side button again, input the same passcode and tap end to stop your Guided Access session.
You can use your fingerprint (Touch ID) or your face (Face ID) instead of a passcode to turn off Guided Access. This is especially useful if you already use them to unlock your iPhone or iPad. To use Touch ID or Face ID with Guided Access, you'll need to first set up them in settings. Then, instead of selecting a passcode in the Guided Access settings, simply opt to use Touch ID or Face ID.
Bonus: Keep the device screen always on
You can keep the screen permanently on by heading back into the Guided Access section of the Settings menu and turning Mirror Display Auto-Lock on.
This is especially useful if you wish for an old device to become a permanent wall-mounted fixture in your home – say, using it as a digital photo frame. Then go back to the main Settings menu and enter Display & Brightness > Auto-Lock, then adjust the setting to Never.
Hope you find it helpful and let me know if you have any questions.
- Manuel Escrig
 Share on Facebook
|
 Share on X
Read More From Blog.
How to turn your iPad into a Digital Photo Frame
Start taking advantage now of your old device and use it as a digital picture frame to revive your best life moments. It's pretty easy. Here we will explain to you how.
